*updated August 2021
Do you want to know how to combine images to create interesting compositions? Do you want to know how to hide parts of an image without actually erasing or damaging your original photo? Well then, you want to know how to use Layer Masks.
In Photoshop (and almost any other graphics or photo editing software) Layer Masks allow you to combine images and create compositions in a non-destructive way. Layer Masks let us hide and show parts of a layer. They are an essential skill for anyone creating graphics, creating new artwork combining images or editing photographs.
What Are Layer Masks?
A Layer mask lets you hide or display parts of a layer without erasing or destroying any pixels. You can even make parts of a layer semi-transparent which is great for creating compositions. Layer masks are useful because they are reversible and non-destructive. We can turn the masks on and off as required and we can easily change them by simply painting on them with a brush.
In this post, we’ll take a look at how to add layer masks to your images to create new compositions and edit photographs.
We can use layer masks on images, text, shapes – anything that appears on a layer can be masked.
Let’s start by having a look at how a layer mask works on a simple image with just one layer.
How To Create A Layer Mask
1. Open any image or photograph in Photoshop.
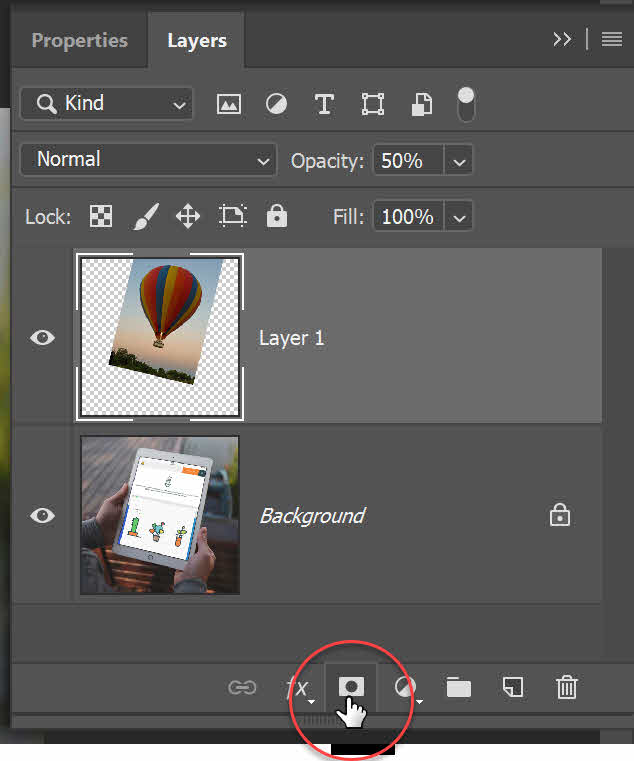
2. Click the Add layer mask button at the bottom of the Layers panel.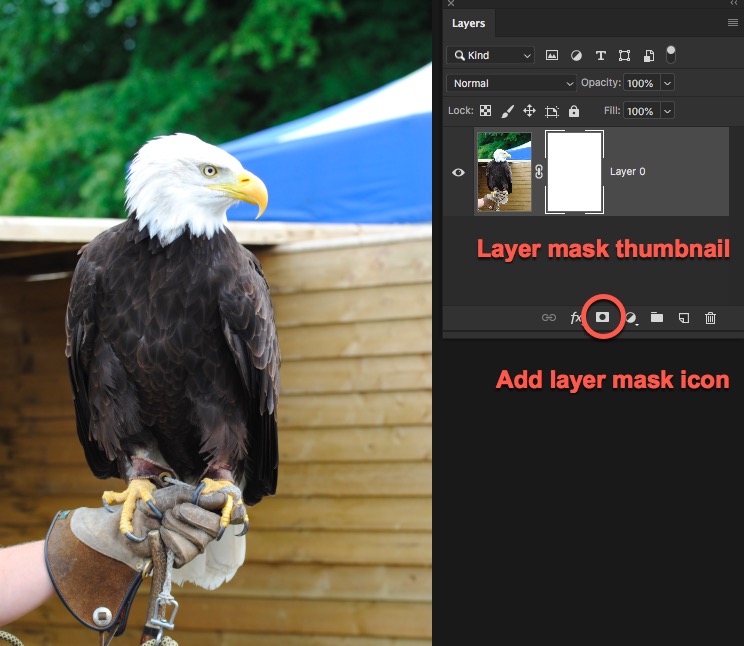
A white layer mask thumbnail appears on the selected layer. A white layer mask shows everything on that layer. In order to hide part of this layer, we need to paint on the mask in black.
3. In the Layers panel, click on the layer mask thumbnail to make sure there is a white border around it. This is very important. We want to make sure we are painting in black on the mask and not on the actual pixels in the photo or image.
4. Select the Brush tool in the Toolbar, or hit B on the keyboard as a shortcut. In the Options bar at the top of the screen, open the Brush Picker and choose the size and hardness of the brush. I’m using a round, 500 px brush with a hard edge.
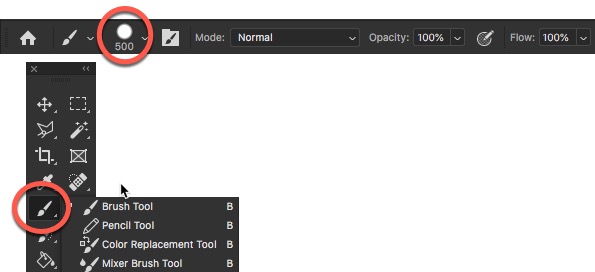
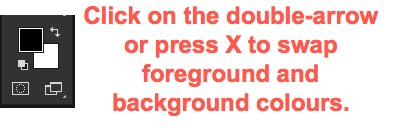
5. Press D on the keyboard. This sets the foreground colour to white and the background colour to black. We want to paint in black, so hit X on the keyboard to swap the foreground and background colours.
6. Paint on the image and you’ll see a checkerboard pattern appear in the areas you’ve painted black on the layer mask. The checkerboard pattern represents transparency and as we paint with black on the layer mask, it is almost as if we are cutting a hole in the current layer to see what is underneath. If you had another image on a layer underneath this one, you would see it in the areas where you’ve painted in black.
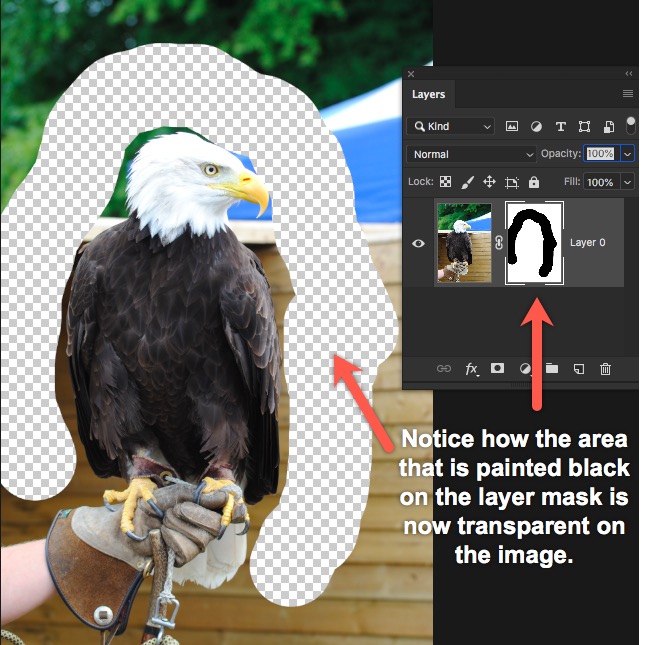
7. Let’s paint back in some of the layer that we’ve hidden with black on the layer mask. Press X on the keyboard to swap the foreground and background colours again. Then paint in white over some of the areas you’ve previously hidden.
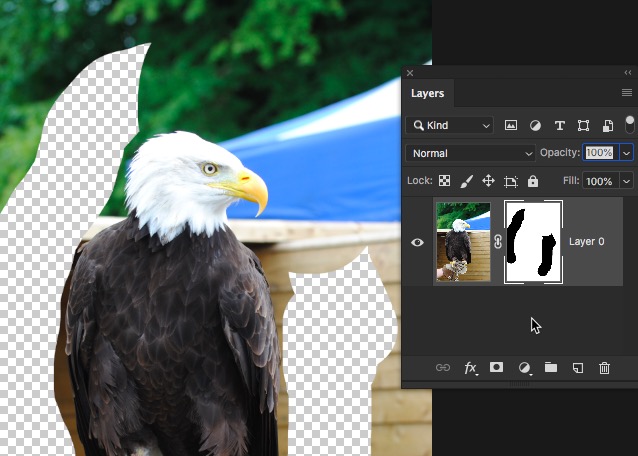
The basic rules of using layer masks are:
- White areas on the mask are visible on that layer
- Black areas on the mask are hidden on that layer
- Grey areas are semi-transparent. The level of transparency will depend on how light or dark the grey is.
Let’s look at another, more “real world” example of using layer masks to combine two images together.
How To Combine Two Images With A Layer Mask
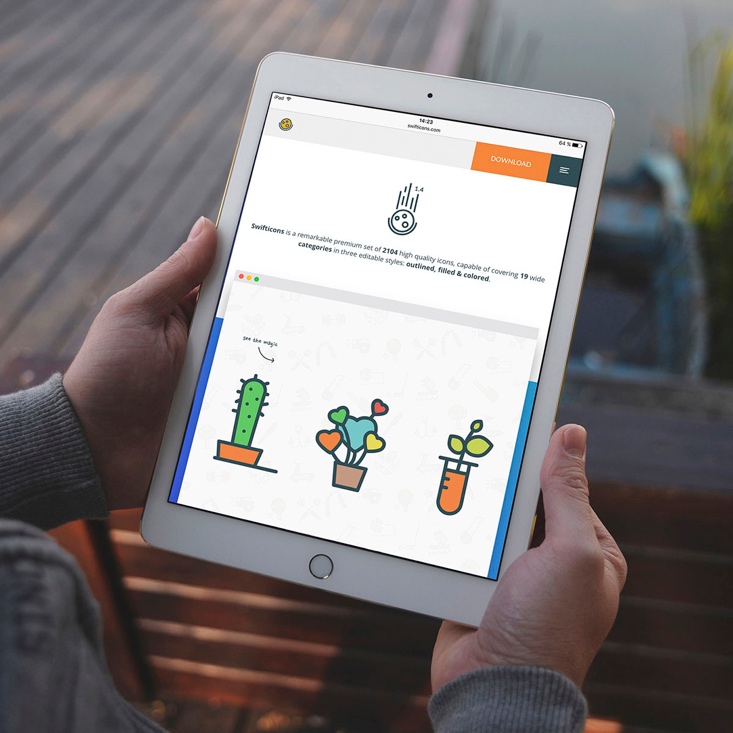
1. In Photoshop, open up a background image. I’m using this picture of someone holding an iPad, which you can download for free from Freepik. https://www.freepik.com/free-psd/tablet-screen-mock-up-design_1000630.htm#term=ipad&page=1&position=22
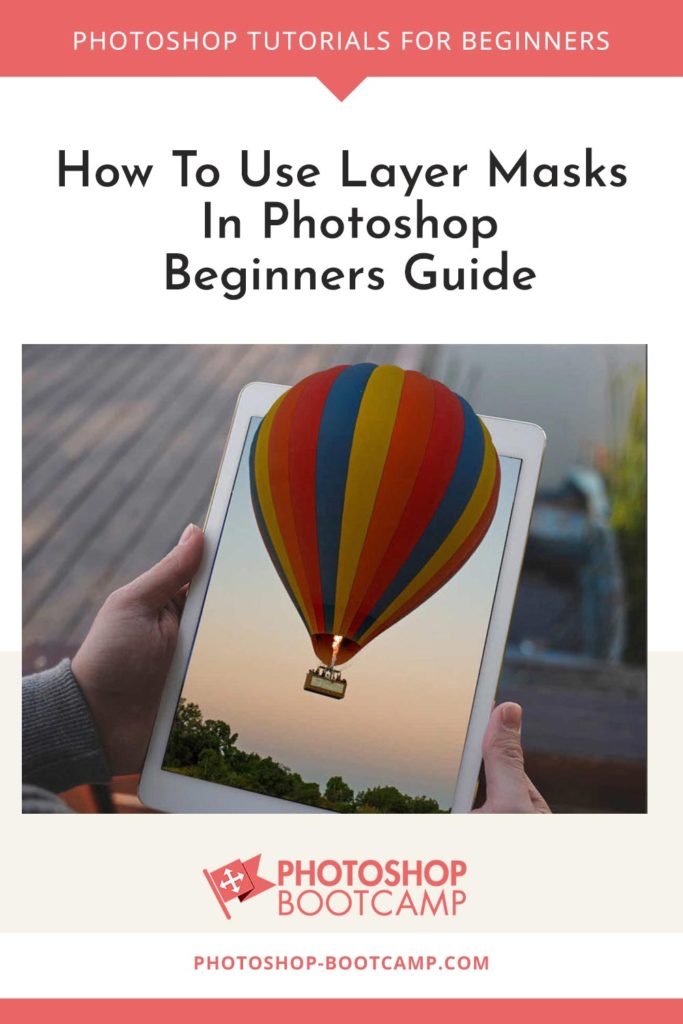
2. Open a second image. I’m using this one of a Hot Air Balloon by David Clode, which can also be downloaded for free from Unsplash. https://unsplash.com/photos/Hv4cyj2UJEc. We’re going to make it look like the balloon image is appearing on the screen of the iPad.
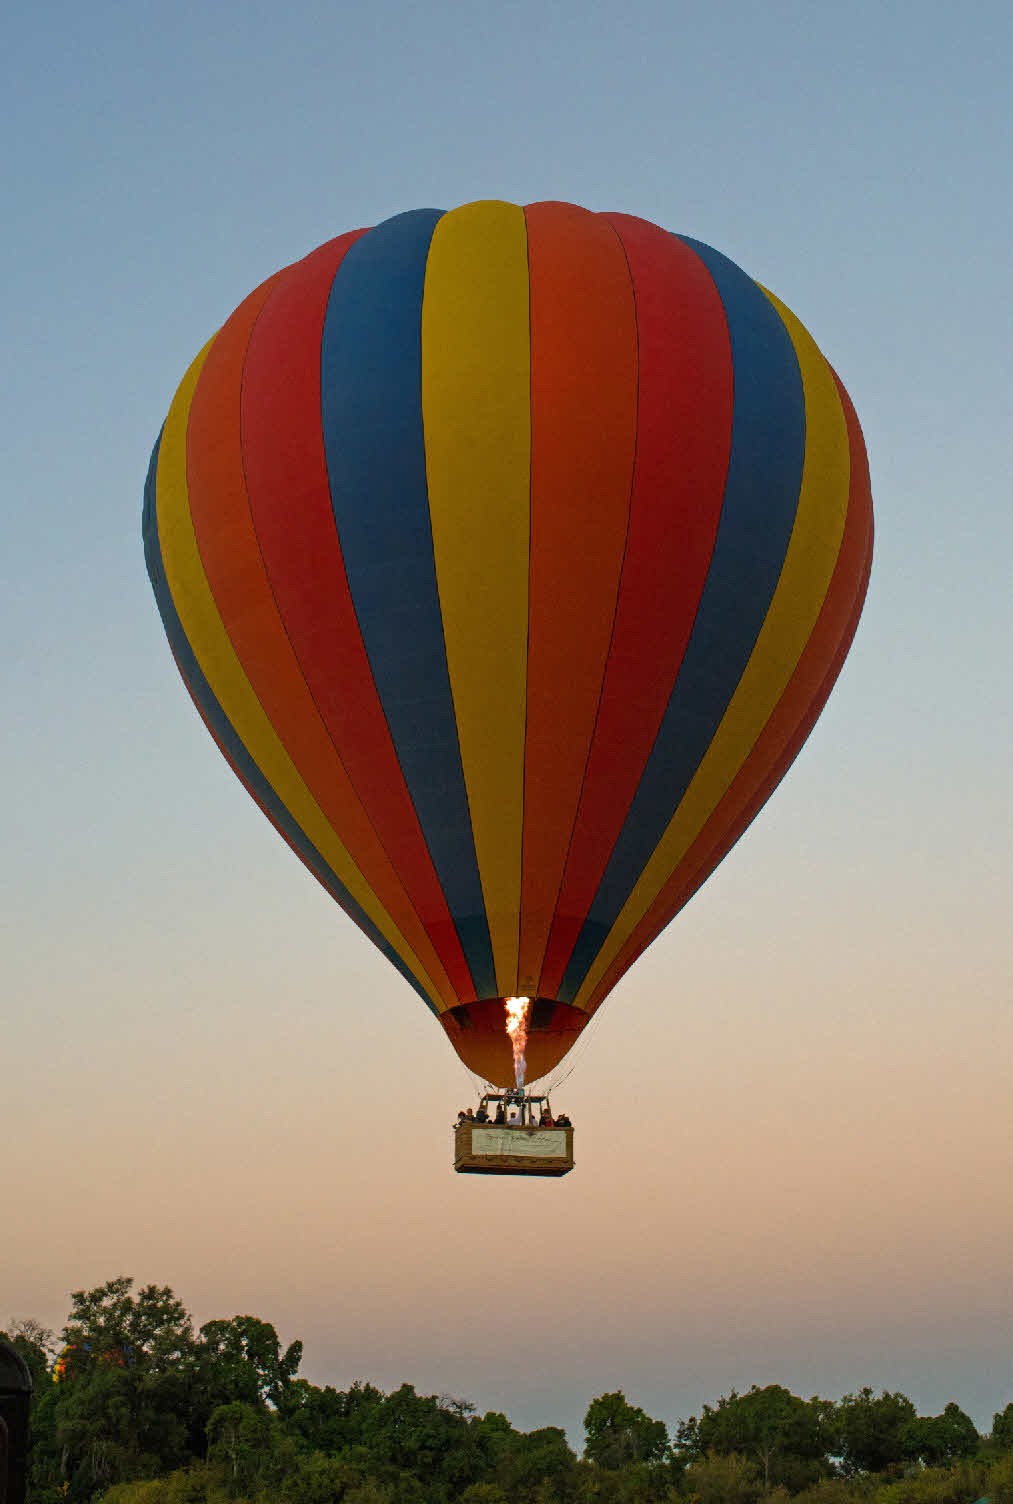
3. In the hot air balloon image, Choose Select > Select All or hit Cmd + A (Mac) or Ctrl + A (Windows) on the keyboard to select everything in the balloon picture.
4. Go back to the iPad image, then paste the hot air balloon you have just copied into your destination image (the picture of the iPad), by pressing Cmd + P or Ctrl + P.
The balloon image is now sitting on a layer, above the Background iPad image. If you’re using the same images as me, you’ll see that the balloon image is much larger than the iPad image, so we need to transform the balloon to scale it down.
6. Choose Edit > Free Transform, or hit Cmd + T or Ctrl + T on the keyboard to apply a Free Transformation.
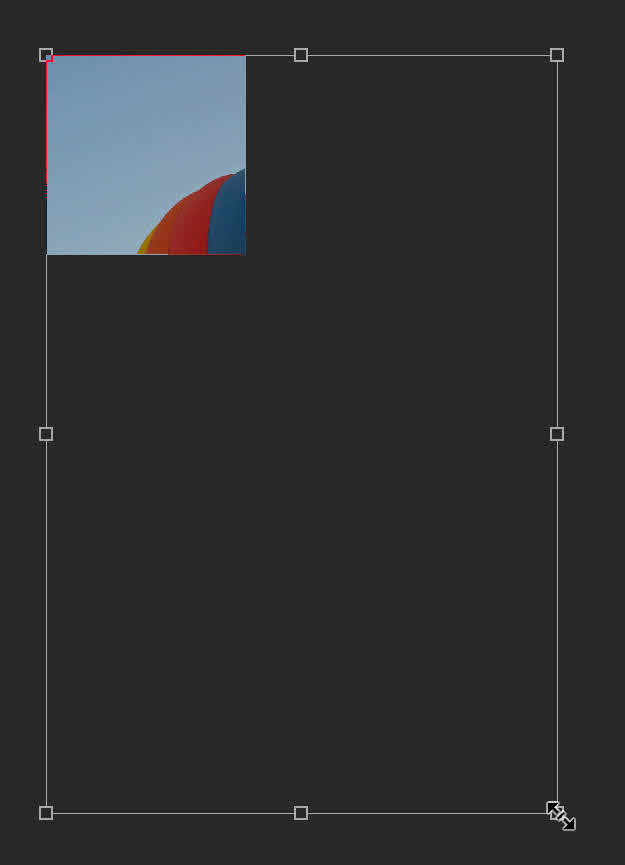
You’ll see a bounding box appear around your image with small boxes in the corner. These are the handles for resizing. In order for us to see all of the handles in each corner, zoom out of the image by pressing Cmd + – (minus sign) or Ctrl + – . Keep zooming out until you can see the entire bounding box and the handles in each corner.
7. Move your cursor over the bottom right handle and drag it diagonally up and towards the left. Note: If you’re using a Photoshop version older than CC 2019, hold down Shift as you drag to constrain the proportions.
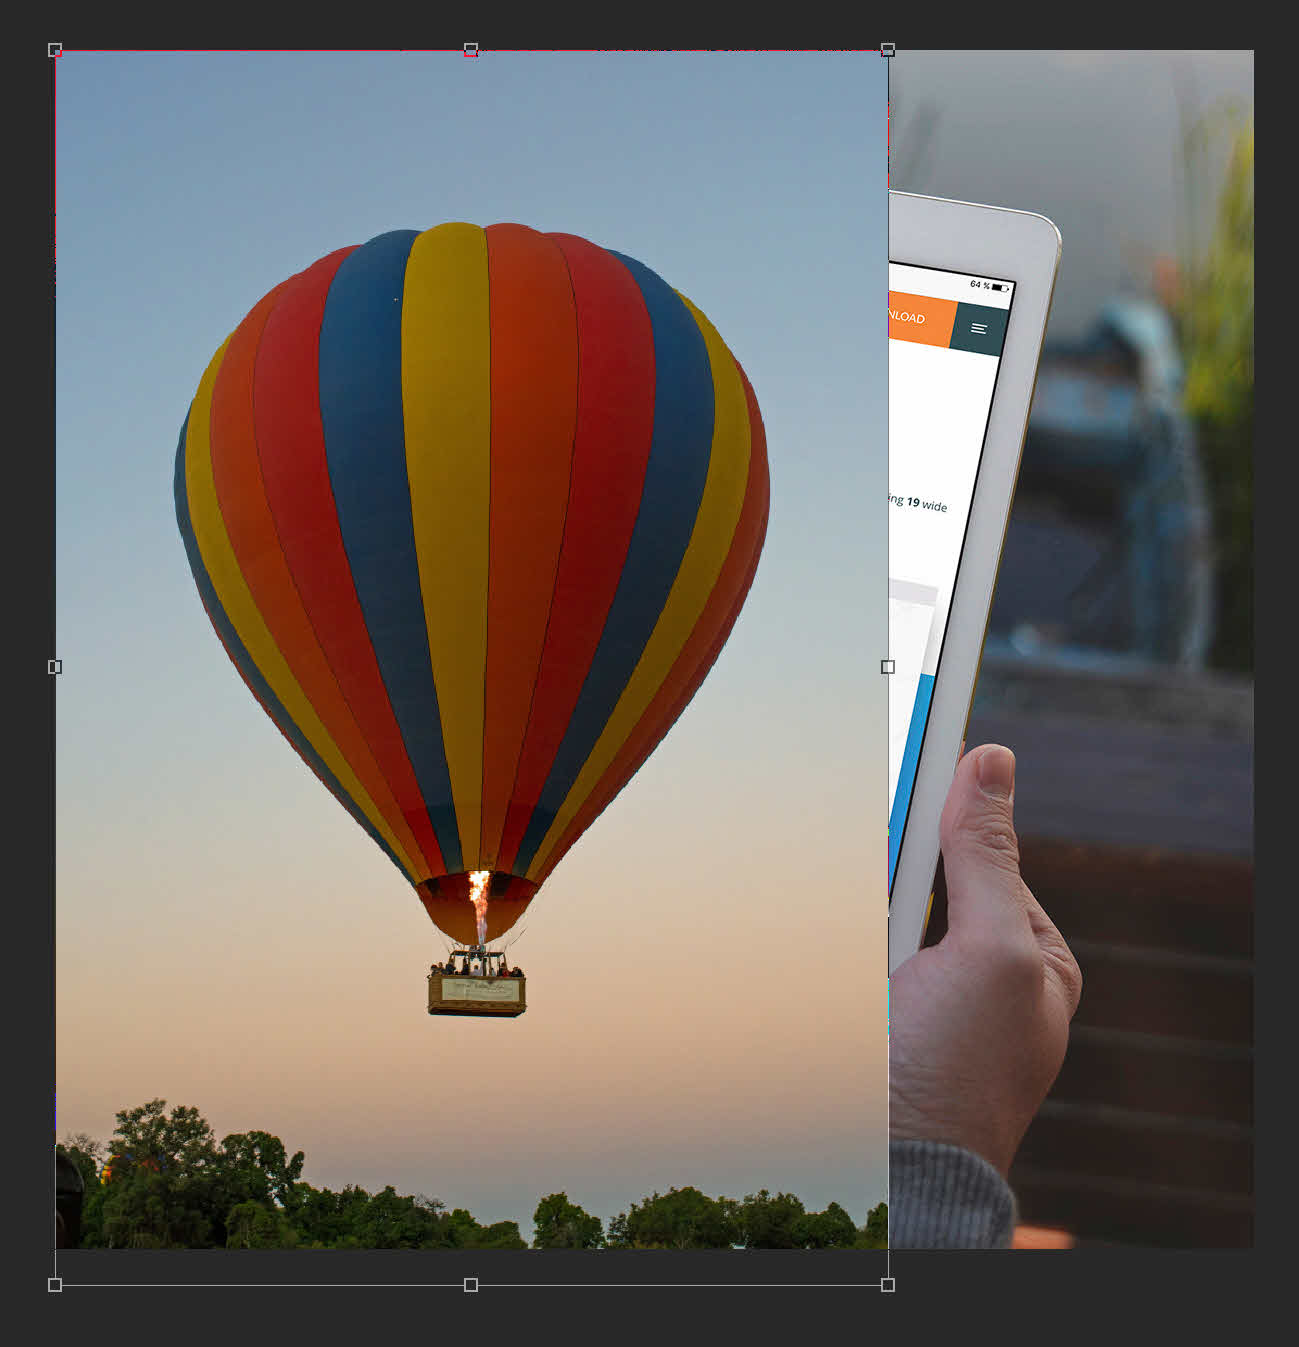
Keep dragging until your balloon image is approximately the same size as the iPad image.
While the bounding box is still around the balloon image, press Cmd + + (plus sign) or Ctrl + + to zoom in again. Do Not press Enter / Return on the keyboard yet. We still need to rotate the image using Free Transform.
8. On the Layers panel, reduce the Opacity of the top layer to about 50% so that you can see both layers at the same time.
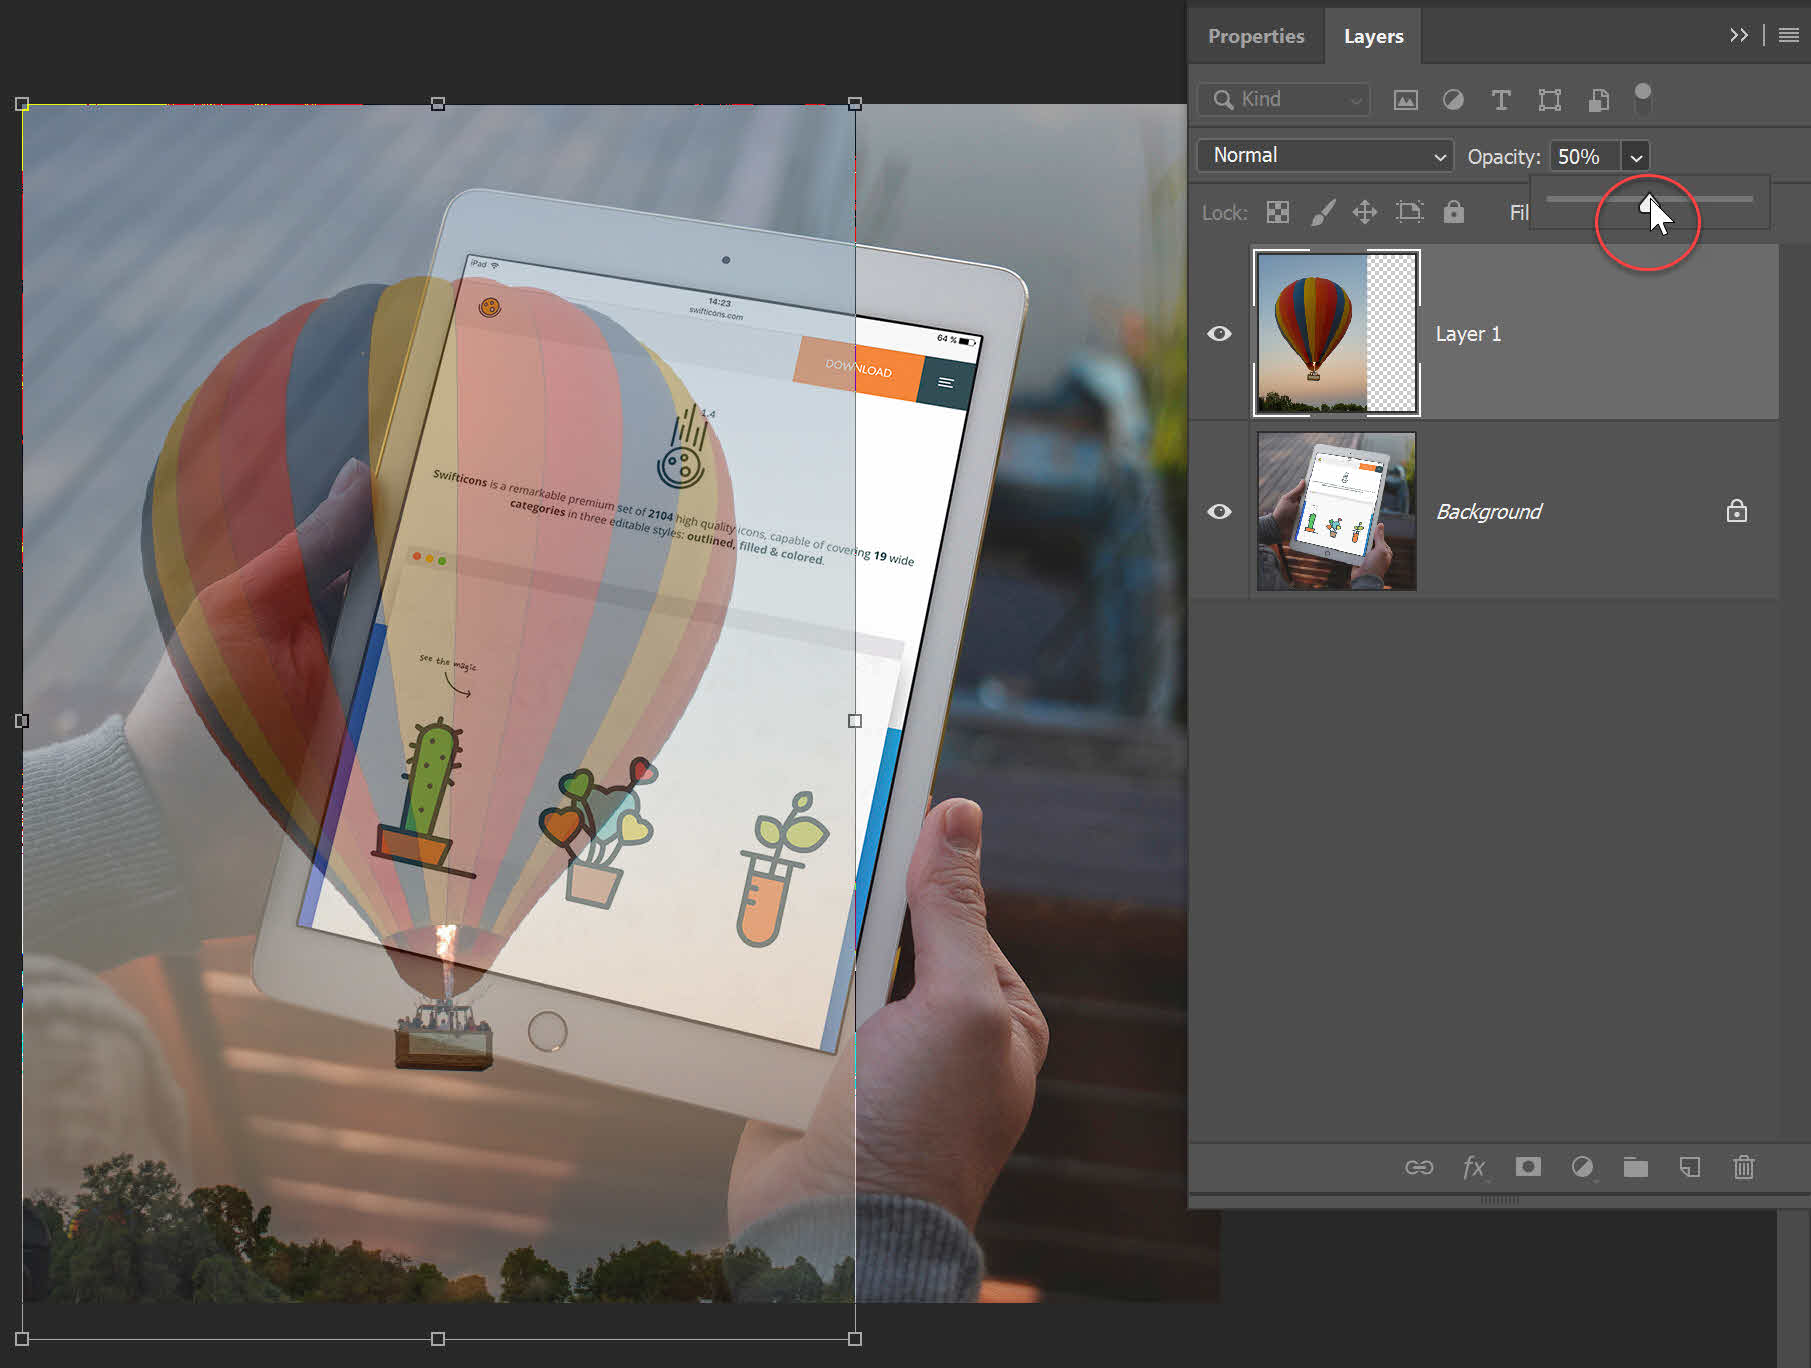
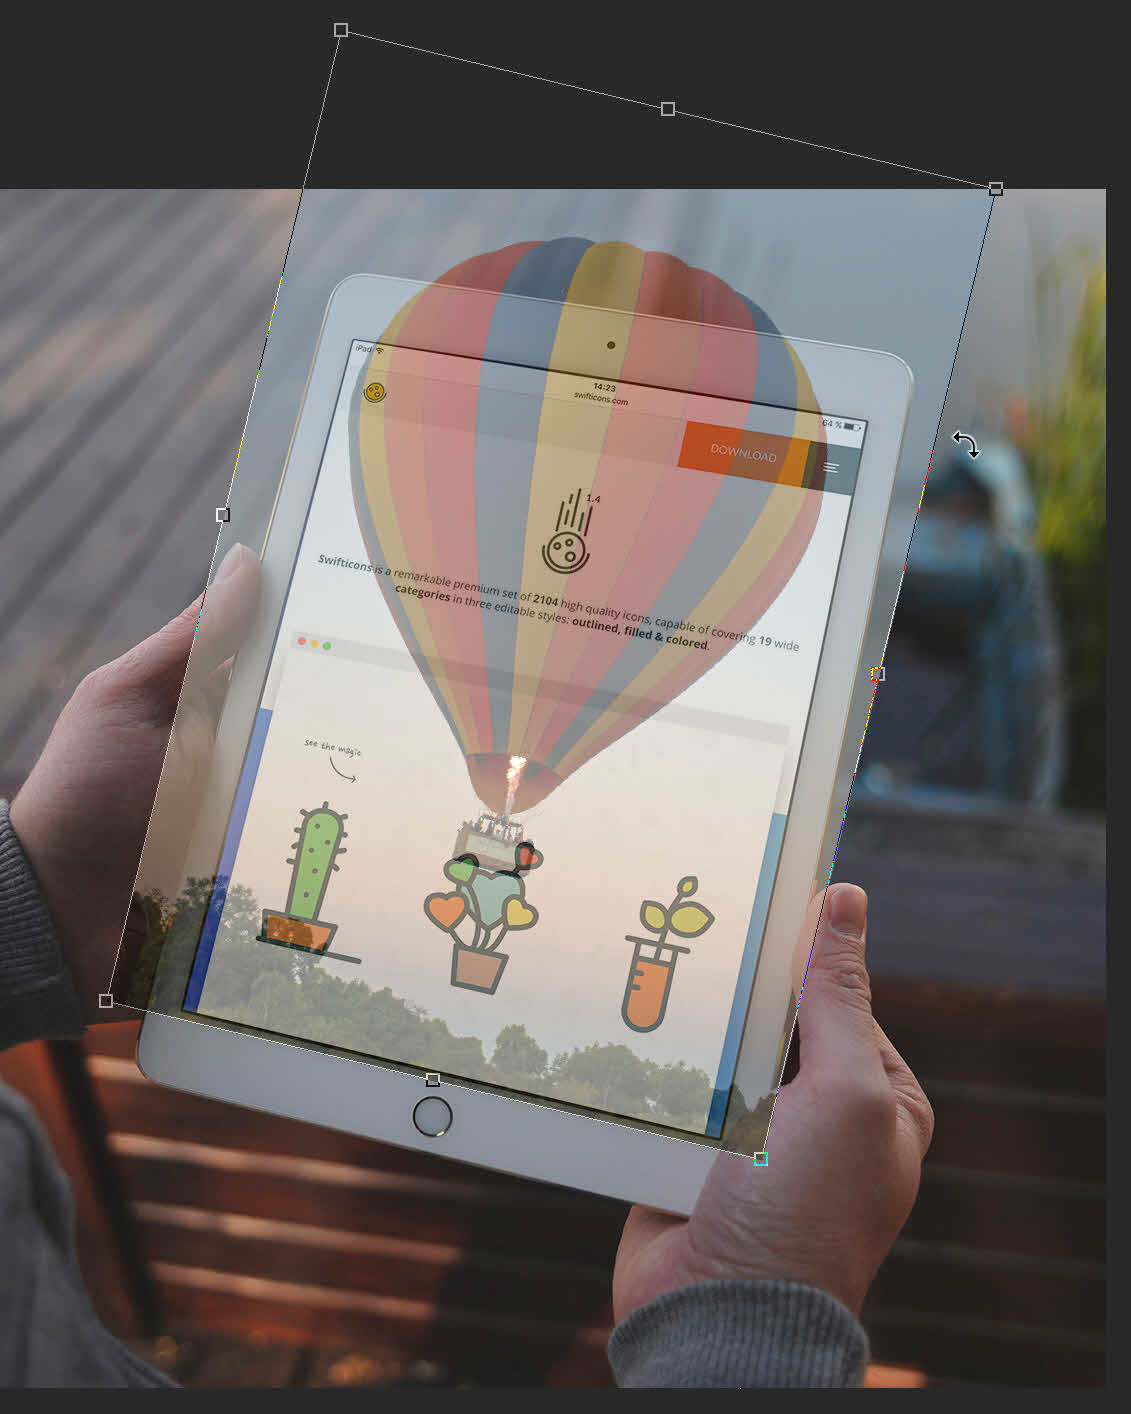
9. Move your cursor over one of the corner handles so it changes to a double arrow. Drag the corner handle so that the balloon image lines up with the angle of the screen in the iPad. Scale the balloon image again so the top of the balloon goes over the top of the iPad. When you’re happy with the positioning of the top layer, press Enter / Return on the keyboard to commit the transformation.
10. Now we’re ready to add our layer mask. With the Balloon layer selected, press on the Layer Mask icon at the bottom of the Layers panel.
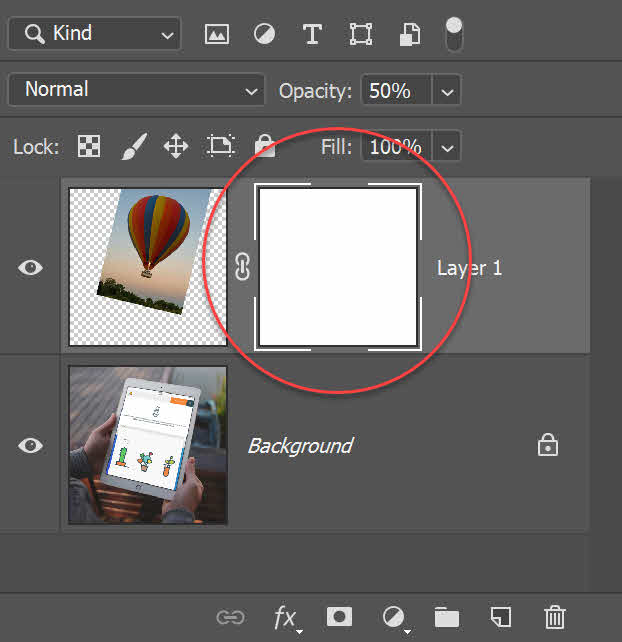
11. Make a selection around the edge of the iPad screen. I used the Polygonal Lasso tool, to make an easy rectangular selection.
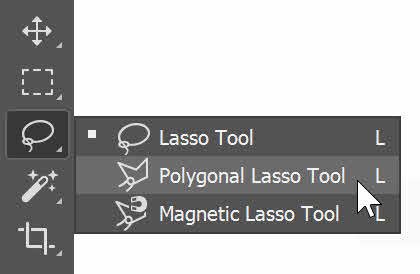
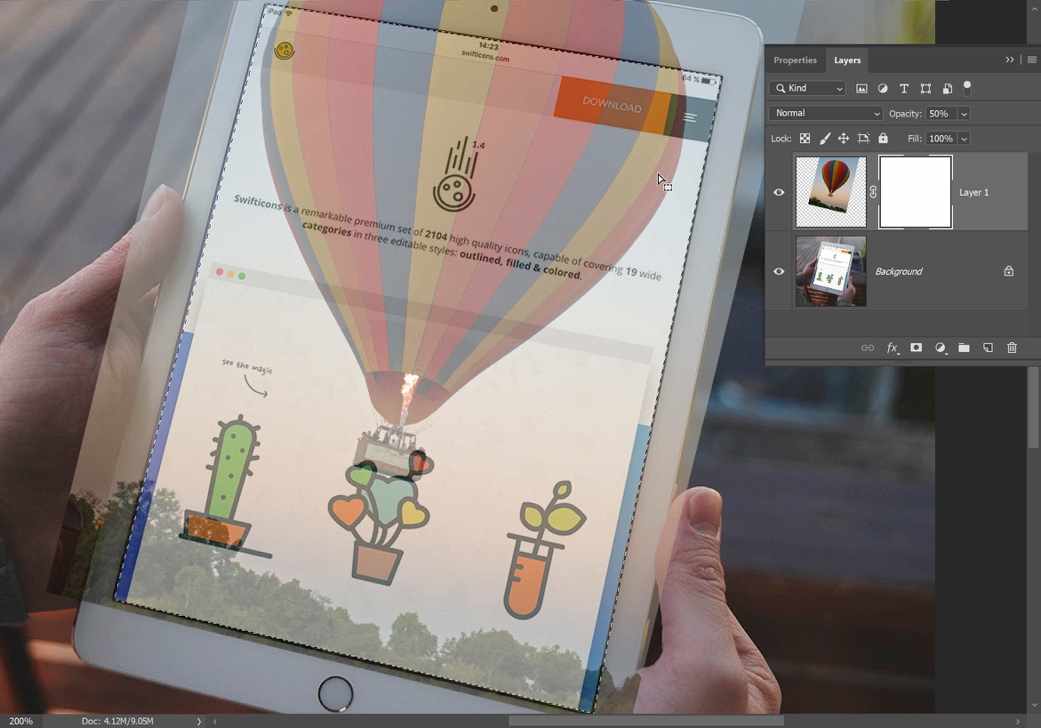
12. Choose Selection > Invert to invert the selection so that everything except the iPad screen is selected.
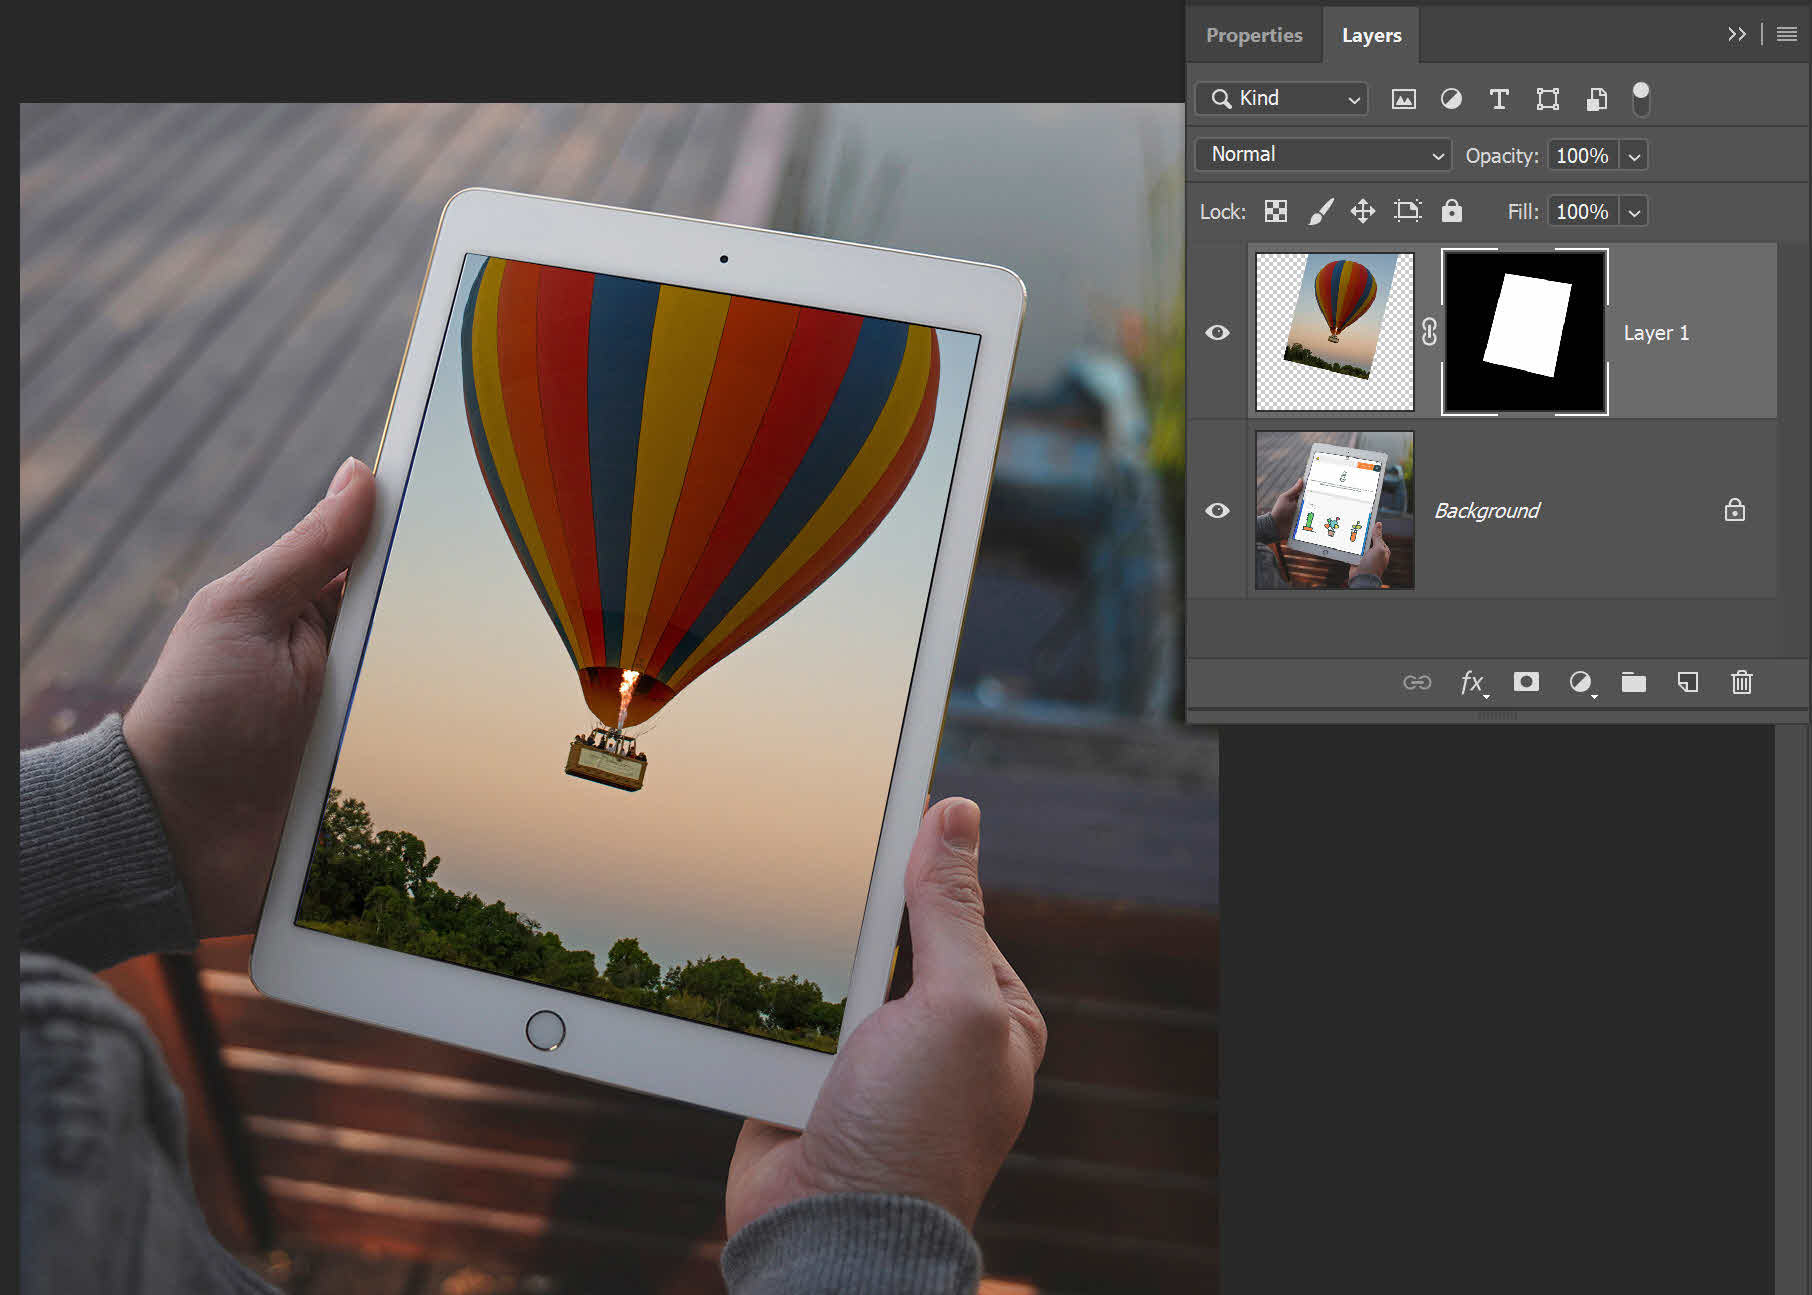
13. Select the Paint Bucket tool, then click on the layer mask thumbnail in the Layers panel to make sure it is selected. Set your foreground colour to Black, then click on the image. The area that is filled with black is now hidden. Set the opacity of the layer back to 100% and your image should look a little bit like this. Layer magic in action. We have successfully and fairly realistically combined two images.
Optional Extra Steps
We could stop there. But let’s take the masking a little bit further so that it looks like the top of the balloon is coming out past the top of the iPad.
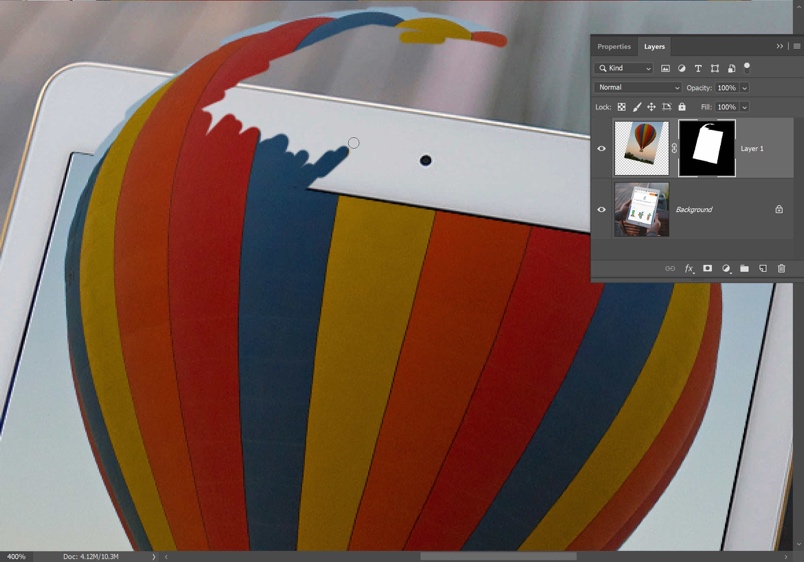
1. Select the Brush tool again by pressing B, then set the foreground colour to white. Start painting in white where the top of the balloon is. Don’t worry about “going outside the lines”, it’s easy to back and paint in black to hide any extra bits you’ve accidentally revealed.

2. If you want to disable a layer mask temporarily, right-click on the layer mask thumbnail and choose Disable Mask from the drop-down menu. Right-click again to Reveal the mask again.
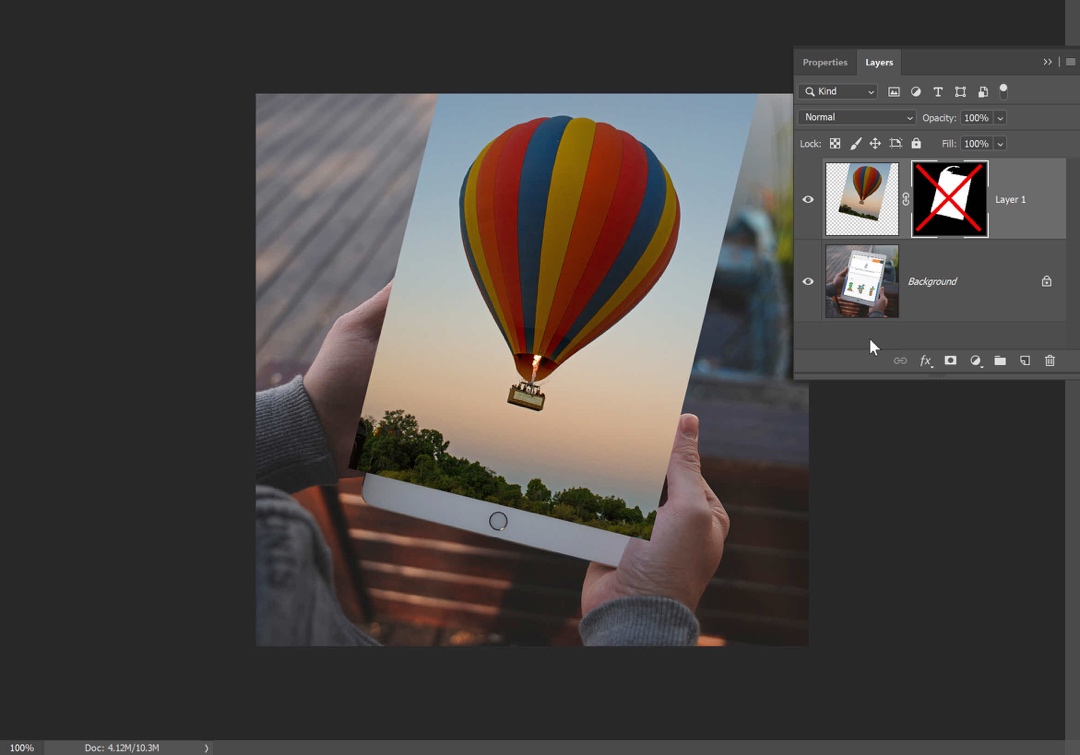
3. Continue to paint in white to reveal the rest of the balloon, and switch to black to hide any parts you’ve accidentally revealed. Your final image should look a little bit like this:
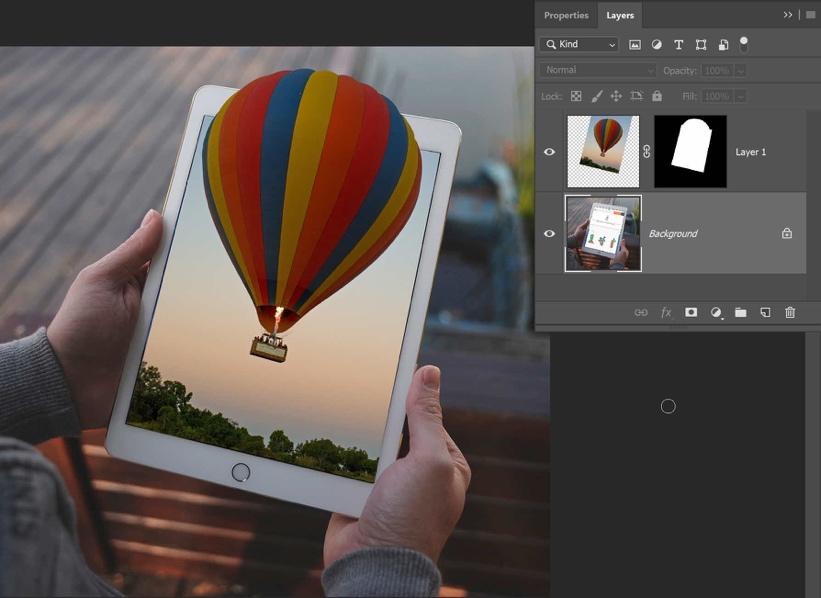

16. When you’ve finished, save your image as .PSD or .TIFF format to keep the layers and layer masks for your future editing.
Some other posts I’ve written related to Masks & Layer Masks in Photoshop are:
Use A Gradient Layer Mask To Create A Cool Photo To Ink Drawing Effect
How To Retouch And Sharpen A Portrait Photo Using A Layer Mask
How To Put An Image Inside Text In Photoshop Using A Clipping Mask
That completes my beginner’s guide to Layer Masks in Photoshop. If you can do what I’ve just shown you, then you can create all kinds of wonderful compositions using multiple layers.
If you found this useful, please share this tutorial on social media, thank you so much!
Pin this for later!
