*Updated December 2020*
In this short Photoshop tutorial, we’ll take a look at how to make an image appear inside a piece of text.
This is a very popular effect and its created by using a clipping mask.
We will use some text to mask (or hide) parts of the image, specifically the parts of the image outside of the text.

Here’s how our final image will look.
What Is A Clipping Mask In Photoshop?
A clipping mask is an object, for example, a brush stroke, a shape or a letter whose shape masks an image on another layer so that only the parts of the image that are within the clipping mask are visible. To make a clipping mask we need two layers. The shape on the bottom layer defines what is visible on the layer above it. The transparent pixels on the bottom layer mask (or hide) the content on the layer above it. It’s a similar concept to the idea of using a stencil with paint or ink.
Let’s get masking!
1. Open an image in Photoshop. I’m using a beach scene. If you want to follow along you can get this beautiful photo for free by Spencer Watson on Unsplash.

2. Select the Horizontal Type Tool (shortcut T) and in the tool options bar at the top of the screen, choose a font. In this case, a heavy, solid font works well for clipping. I used the font family Monserrat, font style Black, size 72 and anti-aliasing set to strong. It doesn’t matter which color you use for the font.

3. Click once on the image to create a new text layer and type in some text. I typed the word BEACH. Notice that a new Text layer has been created in the Layer Panel.

4. Use the Move Tool (V), to centre the word in the middle of the image or over an area of interest in the image. You can adjust this again later if you need to.
5. Drag the new text layer under the image layer. We’re going to clip the image using the shape of the text we just added. In order to create a clipping mask in Photoshop, the object or shape that we’re clipping to must be underneath the image.
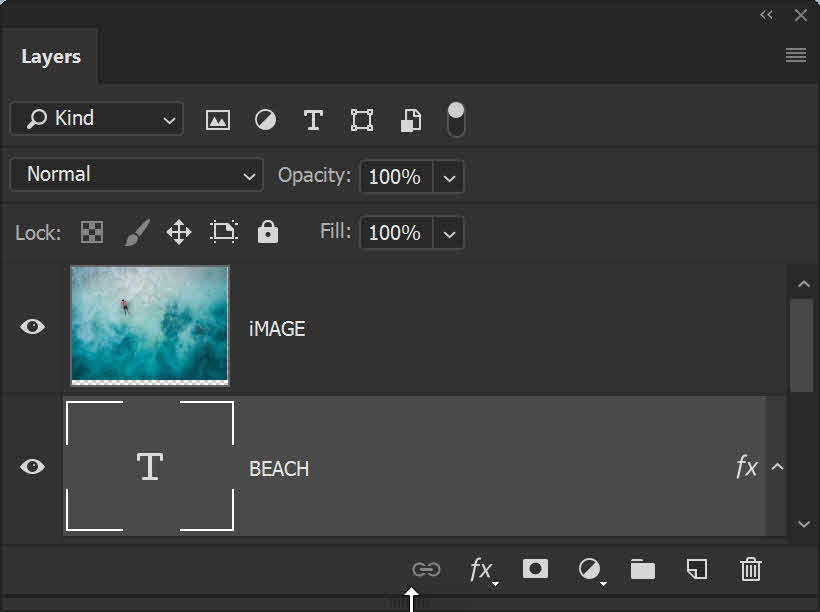
6. Make sure that the Image layer above the text is selected. This is very important! Click on the Hamburger menu icon in the top right corner of the Layers panel. Choose Create Clipping Mask from the menu. Or use the shortcut Alt + Ctrl + G (Windows) or Option + Cmd + G (Mac).
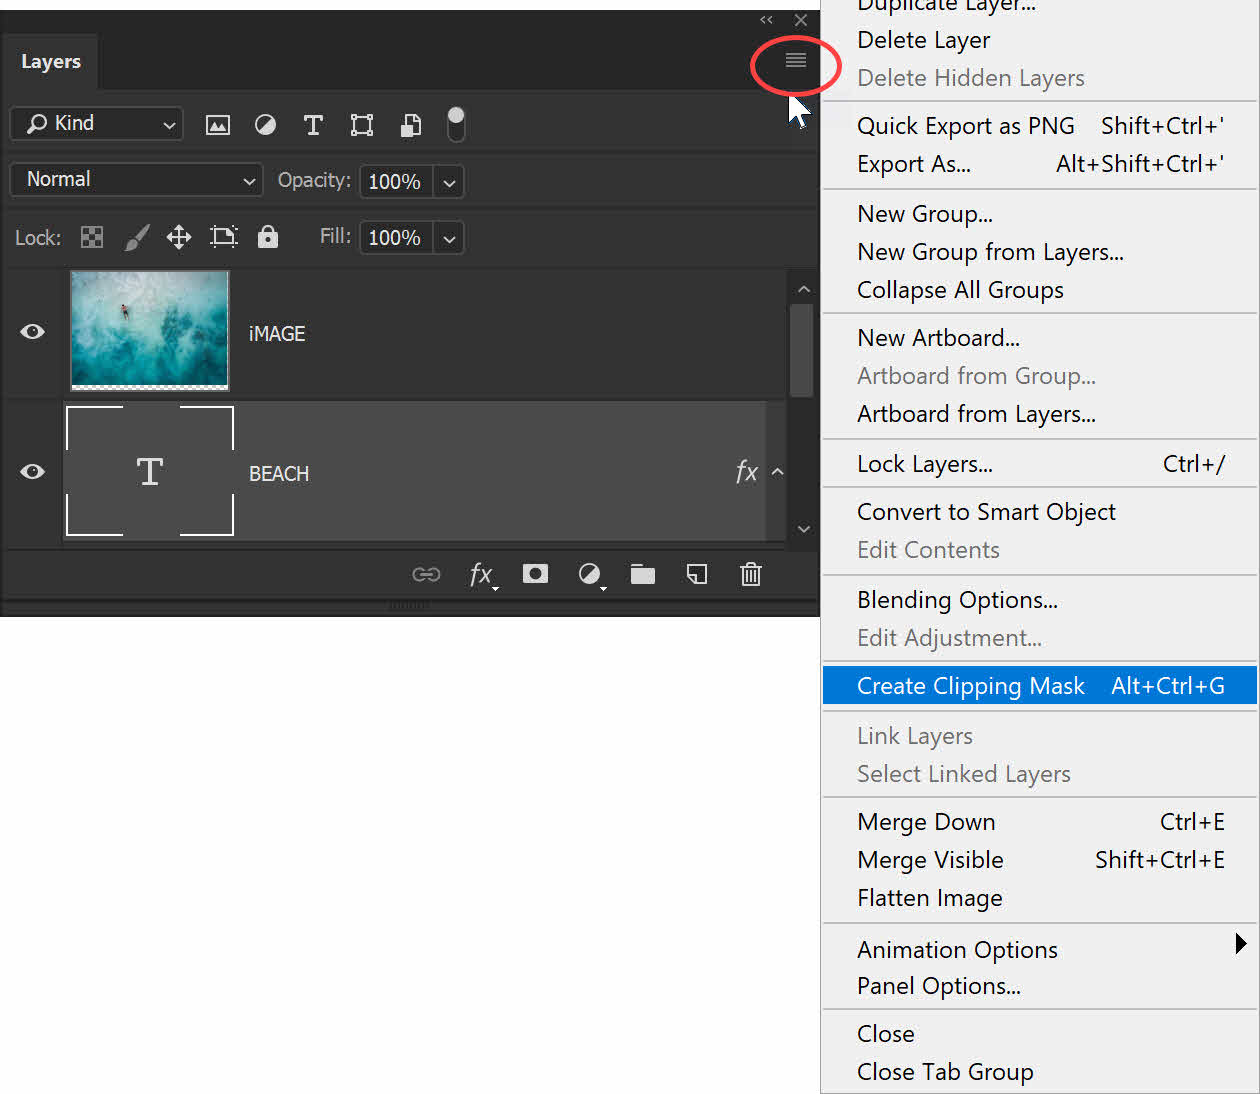
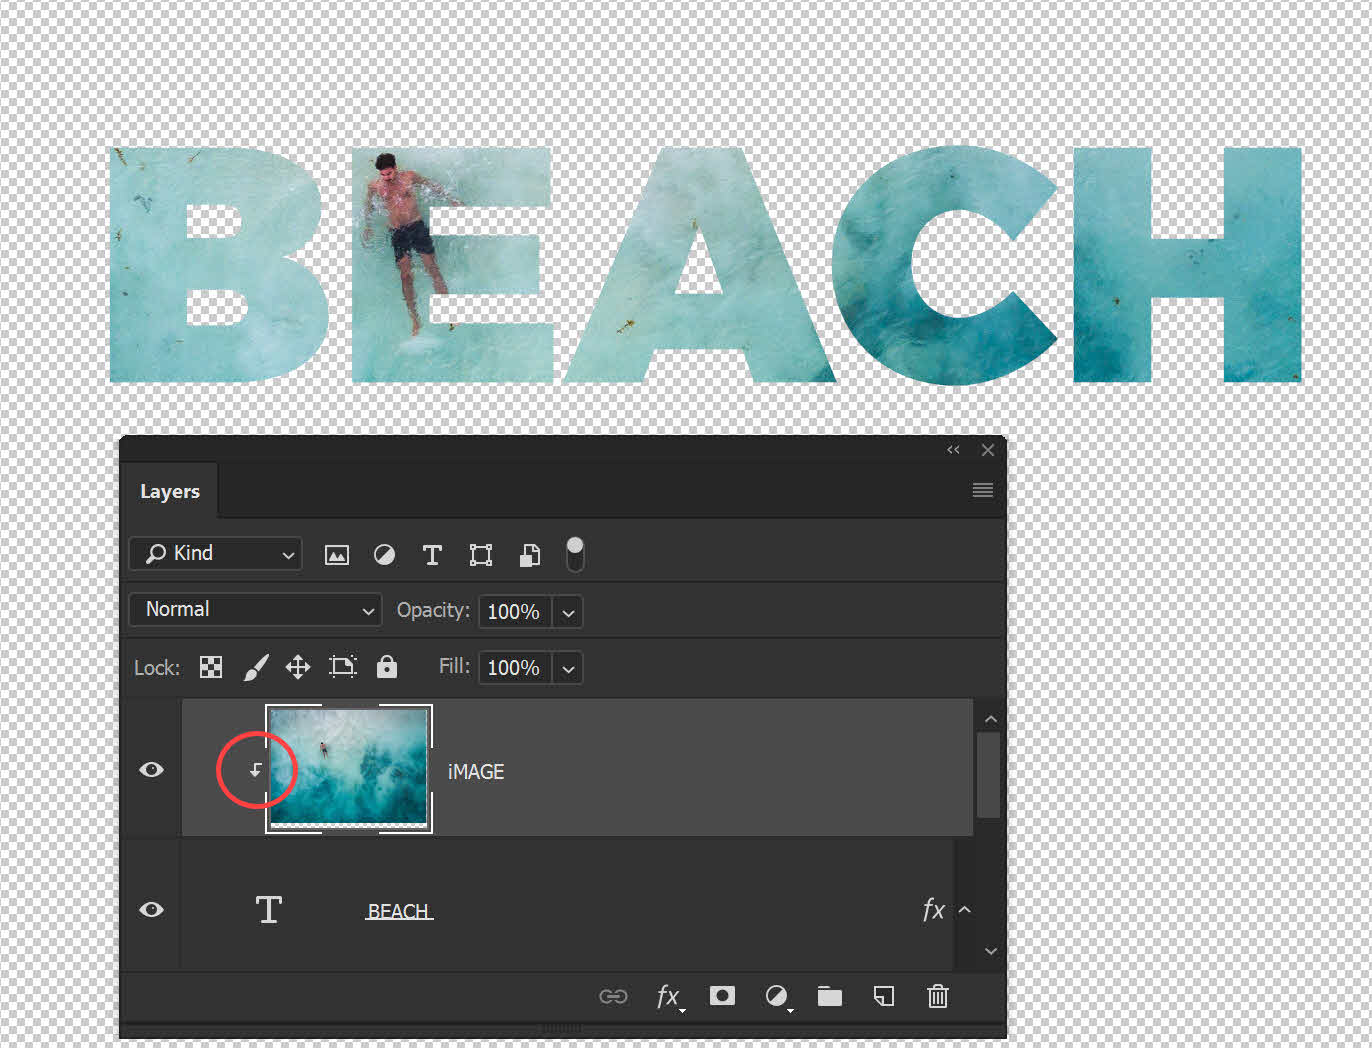
The clipping mask kicks into action and you will see the letters forming the word Beach are now filled with the image of the beach scene.
Everything outside of the actual letters is now hidden by the mask.
Notice on the layers panel how a small arrow has appeared on the image layer and the thumbnail is indented.
This is telling us that the image layer is now clipped to text layer underneath.
If necessary, select the Move Tool (V) and move either the image or the text layer until you get the parts of the image that you want to see lined up.
Tidying Up
Our clipping mask has been created successfully, but we can do a few more things to make the image more interesting and do a general tidy up.
First, we’ll add a layer of white underneath our masked image so that we don’t see the transparent areas.
1. To add a layer underneath the current layer, click on the current layer, in this case, the Text layer, then hold down Ctrl (Windows) or Cmd (Mac) and click on the Create New Layer icon at the bottom of the Layers panel.
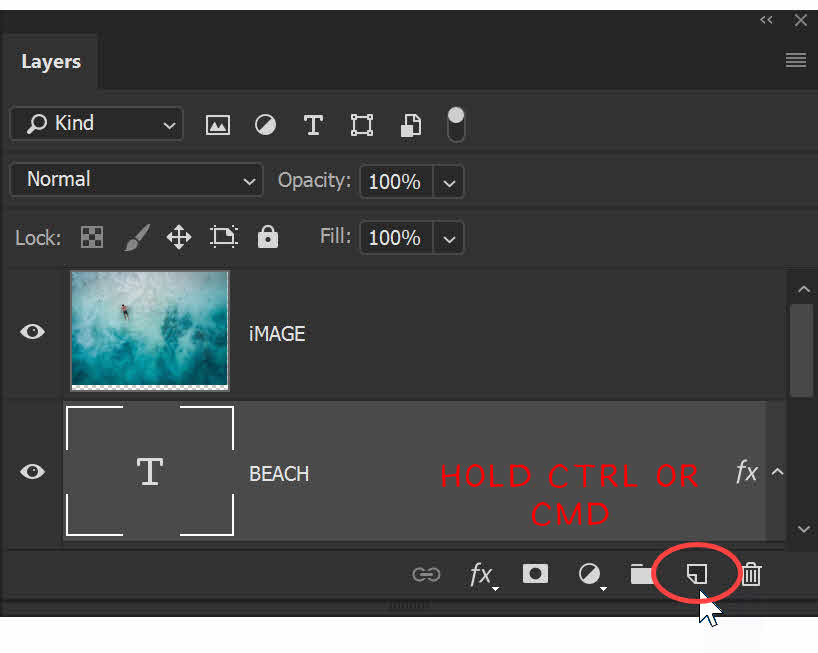
A new empty layer will appear in the Layers panel underneath the text layer.
2. Click on the Foreground color swatch on the Toolbar and make sure it is set to white.
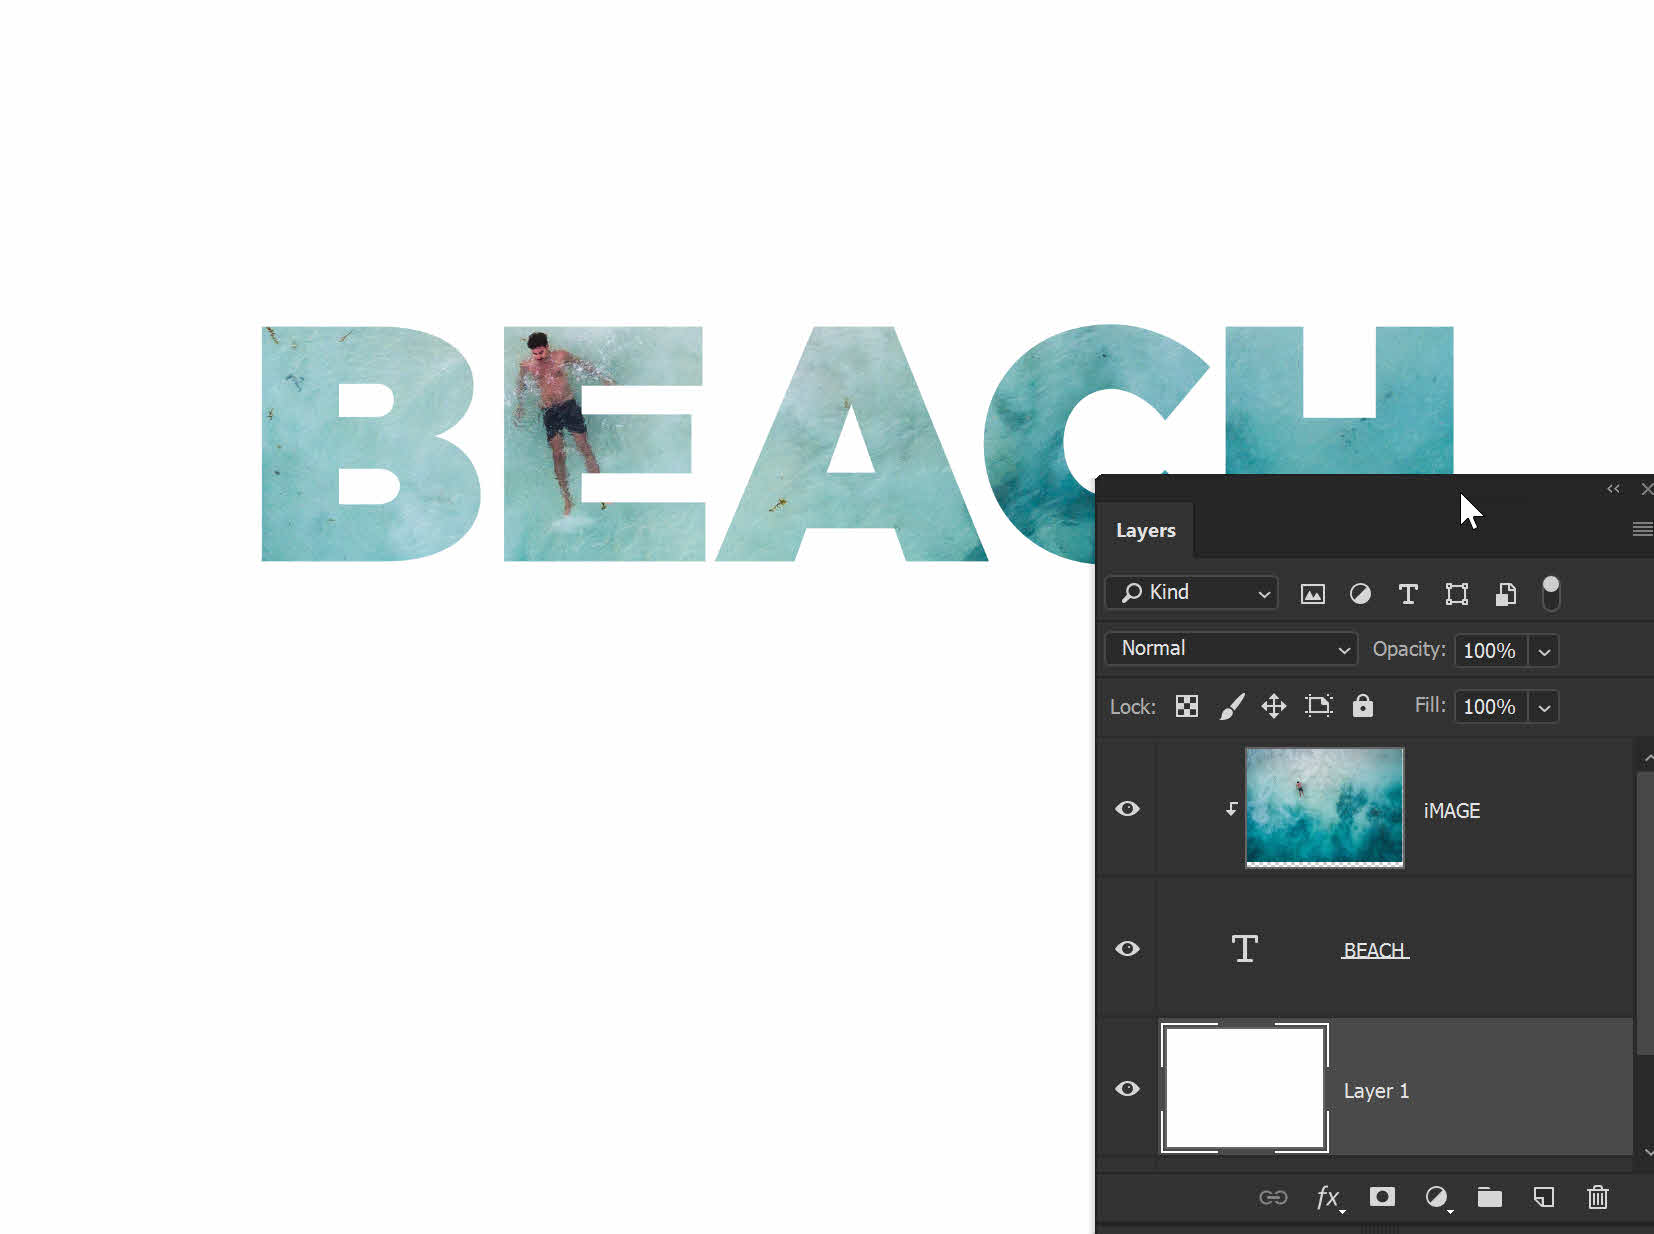
Then select Paint Bucket tool (G), click once on the image to fill the new layer with white.
Your image and Layers panel should now look something likes this:
How To Add A Drop Shadow To Your Text
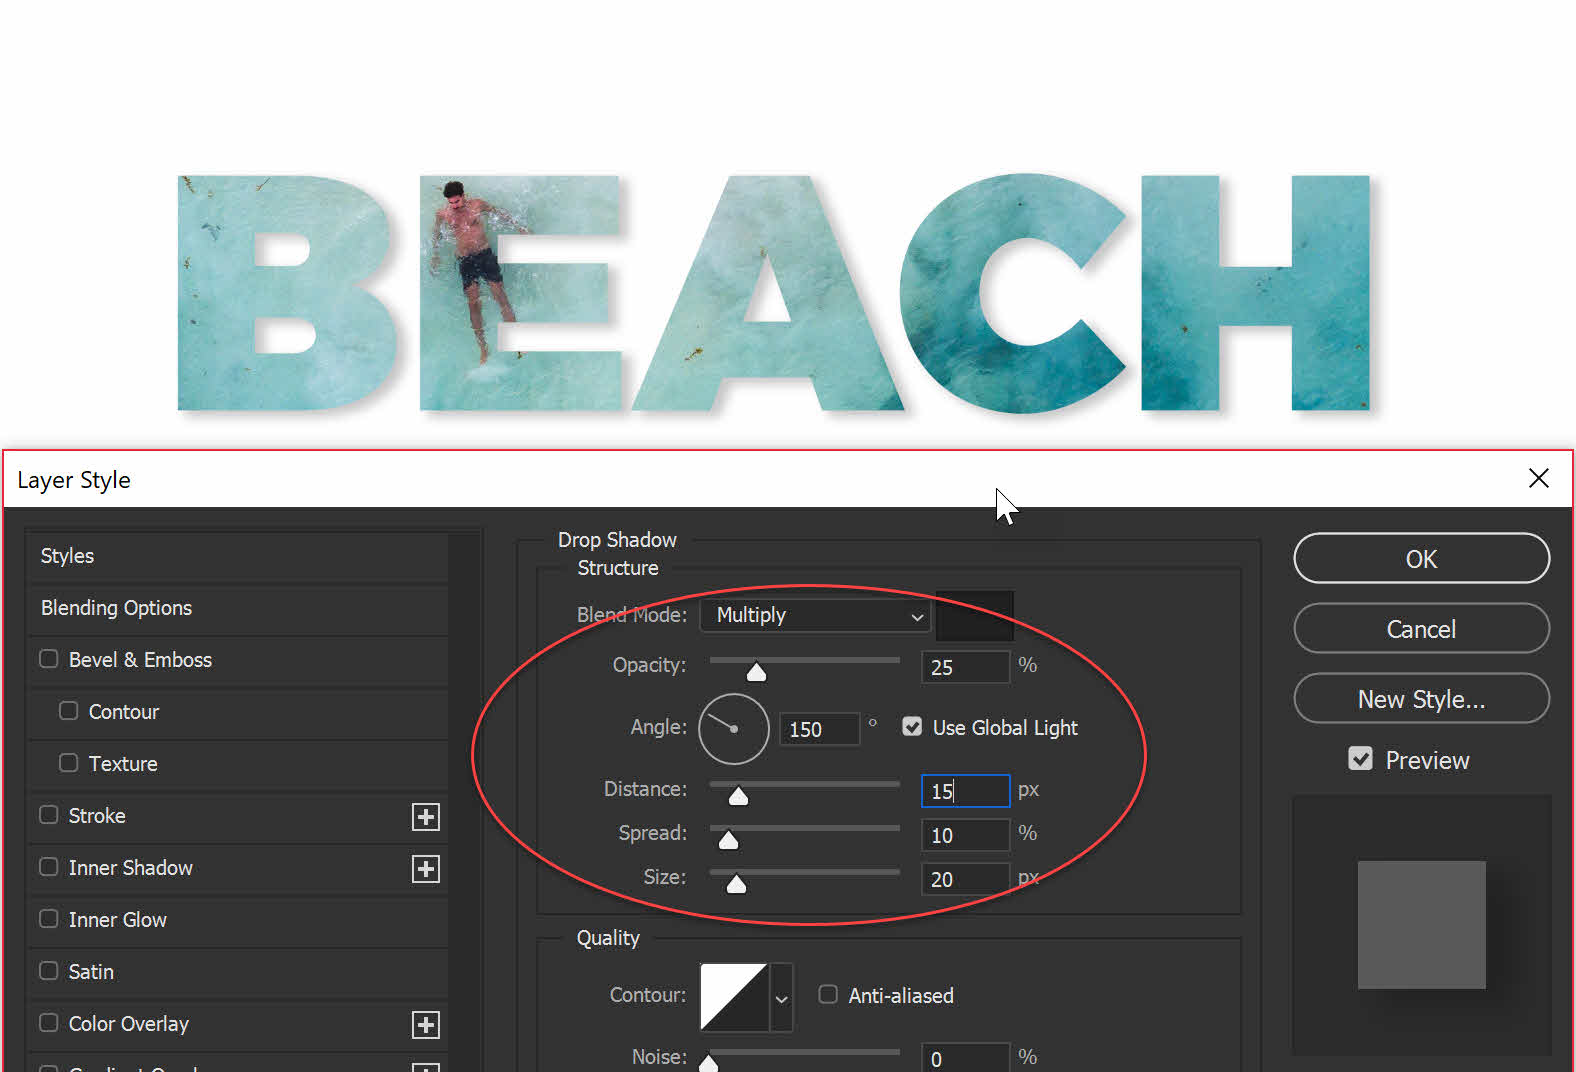
To lift the text off the page a little, and give it a bit more oomph! we’ll add a drop shadow to the text layer.
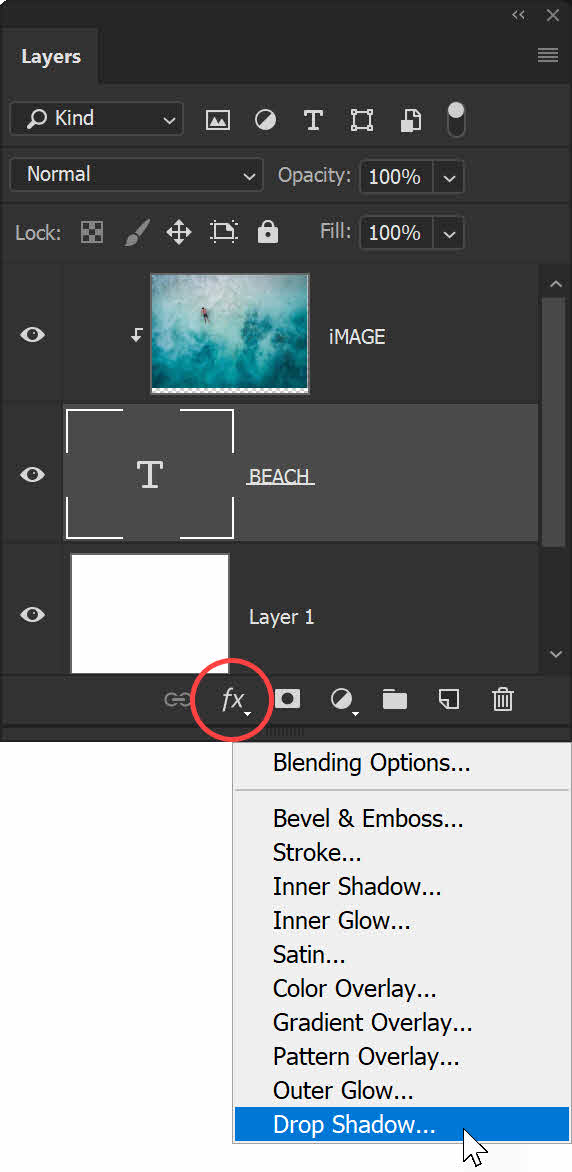
1. Select the text layer to make it active, and then click the Add a Layer Style button at the bottom of the Layers panel and choose Drop Shadow from the pop-up menu.
2. In the Layer Style dialog box, play around with the settings to get the look you want.
I used the following settings to create a subtle drop shadow: Drop Shadow Color is black, Opacity set to 25%, the angle to 150 and the distance, spread and size to 15, 10 and 20px respectively.
Add A Final Piece Of Text
To complete this image we’ll add one more piece of text above the clipped text so that it reads “Life is a beach”.
1. Select the Type tool (T), and in the options bar at the top of the Photoshop screen, set up how you want your text to look.
2. For this example, I’m using a script font called Lemonfish, which I bought on Creative Market, but you can use any type you want. I set the size to 250 pt and the color to a bright orange.

3. Click once on the document window to add some type. Then type in the words “Life is a”. Use the Move tool (V) to drag the new text so that it lines up on the left-hand side with the word Beach. Your final image should look something like this:

I hope you enjoyed following along with the Photoshop tutorial showing how to create a clipping mask using text.
Remember that it’s not only text that you can clip. You can use any shape or brush stroke and clip and image with that object.
I’d be really grateful if you would share this post. Thank you very much!


