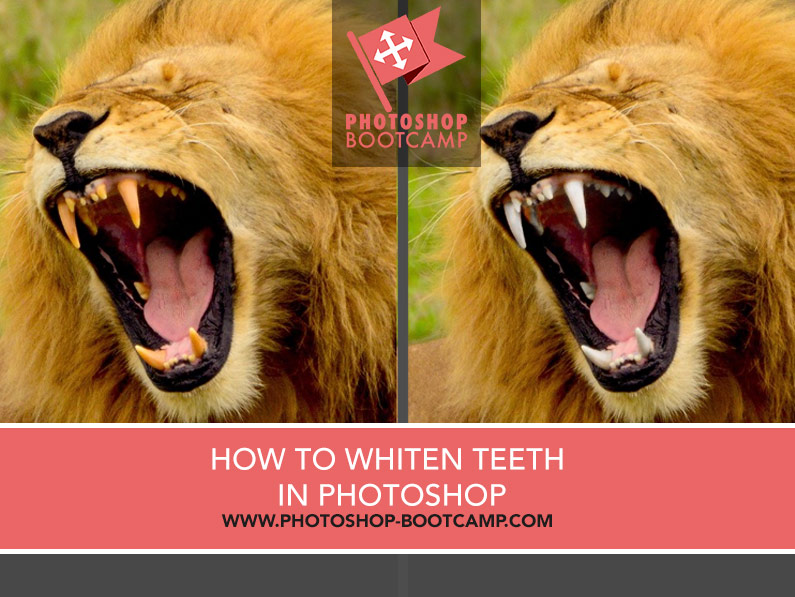
This is one lesson I wish I could use permanently and physically on myself – how to get pearly white teeth 🙂 In Photoshop it’s pretty easy to do this using the Sponge tool to desaturate and the Dodge tool to lighten. The main thing to remember is not to go too crazy with the whitening, the teeth should still look natural. As is often the case when post-processing or editing in Photoshop, there is more than one way to do this, and this is just one method.
Whiten Teeth In Photoshop
1. Open the image of the person (or animal) whose teeth need a bit of whitening. If you’d like to follow along with the same image that I’m working on, you can download this photo of a laughing lion by Lemuel Butler which is free to download here from Unsplash. The lion’s teeth are yellow-orange but he’ll soon have a Hollywood smile. This method works on humans too!

2. Whenever you’re editing images, it’s always a good idea to do make changes on a duplicate layer. Press Cmd + J (mac) or Ctrl + J (windows) to make an exact copy of the photograph appear on a new layer. I renamed the duplicate as “Image Edit”.

3. Select the Sponge tool. ![]()
This may be hidden under the Dodge tool in the toolbar.

4. We’re going to use the Sponge to remove or desaturate the colour in the teeth. In the Tool Options at the top of the screen, set the Mode to Desaturate, set Flow to 100% and turn off the Vibrance so the checkbox is empty.

5. Still in the tool Options, choose a brush size suitable for brushing over the teeth. Choose a brush with a soft edge (or hardness of 0%). You will need to make your brush bigger and smaller as you work over the lion’s teeth. A shortcut for increasing the size of a brush (on any brush-based tool) is to press the right square bracket key . To decrease the size of the brush, press the left square bracket key.
6. Zoom in so that you can see the teeth clearly.
7. Brush the teeth with the Sponge tool making your brush bigger and smaller as necessary. You want to make sure you’re only desaturating the teeth and not his tongue, gums or hair.

Things are looking better already, and that’s just the top set desaturated 🙂 Keep going until you’ve desaturated all the teeth. Don’t forget the teeth at the back which have a shadow cast on them, but are still very yellow.
7. Once you’ve desaturated all the teeth, it’s time to whiten them up. Select the Dodge tool (O) ![]()
8. On the tool options bar, again choose a small soft brush. Pick a brush size that is slightly larger than the teeth. Set the Range to Midtones and set the Exposure to 15%. Leave the Protect Tones box checked. This helps to keep things looking a bit more natural and retains some of the shadows and texture.

9. Work your way around the lion’s teeth with the Dodge tool, again making the brush bigger and smaller when necessary. The Dodge tool has a build-up effect. Each time you release the mouse button and start painting again, the amount of Dodge builds up. If you feel like you’ve gone too far with the whitening, you can press Cmd + Z (Mac) or Ctrl + Z (windows) to step back. Or you can choose Edit > Fade Dodge Tool to reduce the overall effect.
Here are the lion’s teeth before (on the left) and after a thorough brushing.

This Photoshop method works in exactly the same way for human teeth. The thing to avoid is overly bright, dazzling white teeth, but there’s no harm in a little whitening.
I hope you found this useful. I would be super grateful if you could share it. Thanks 🙂
Pin This!

